Below is information and instructions to create two different respiratory devices at home:
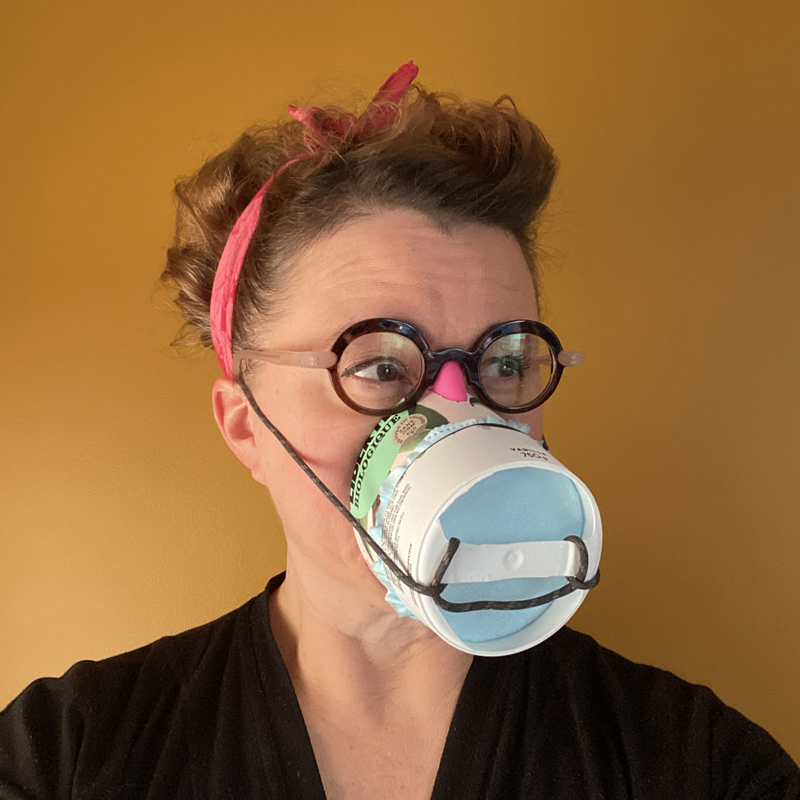 Bissonnette DYI Respirator
(December 2020)
Peer-reviewed Article on the Research:
Improving Improvised PPE: A Custom-fitted, Low-cost, and Reusable DIY Respirator with a Removable Filter
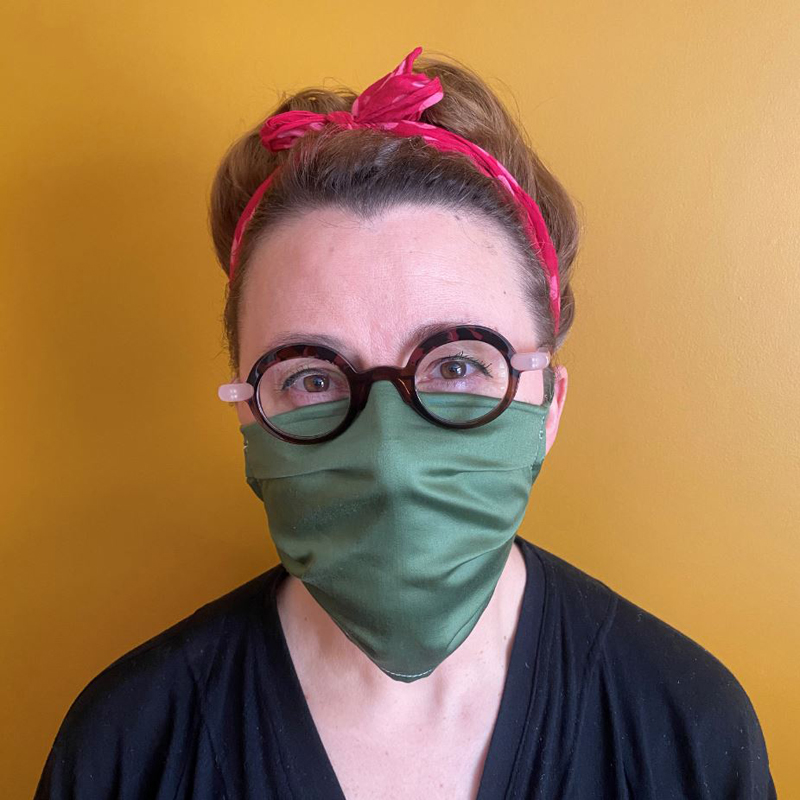
Bissonnette Eyewear-friendly, Two-layer Mask with Room for a Third Layer
(April 2020)
Putting on and Removing Your Mask & Care for Re-use
GENERAL
General information is available from the Government of Canada under “How to put on a non-medical mask or face covering” & “How to remove a non-medical mask or face covering” at https://www.canada.ca/en/public-health/services/diseases/2019-novel-coronavirus-infection/prevention-risks/how-put-remove-clean-non-medical-masks-face-coverings.html
PUTTING ON YOUR 2020/04/11 Bissonnette Eyewear-friendly, Two-layer Mask with Room for a Third Layer
1) Wash your hands.
2) Insert a piece of non-woven textile like an absorbent paper towel in the pocket construction of the clean and dry face mask and, if this works for you with your eyeglasses, the metal wire through the opening at the hem.
3) Remove eyewear by the temples (long horizontal sticks that end behind your ears) and wash your glasses and your hands.
4) Using the ties on the top section, place the mask on your face so that the top centre section rests more than halfway on your nose and the top ties are placed over your ears. Secure the ties loosely at first and put your glasses on. Adjust the mask until you feel comfortable and then secure the top ties more tightly.
5) Secure the bottom ties of the mask below your ears.
6) From this point on do not touch the front of your mask until you are by a place where you can wash your hands and where you can dispose of the mask in an assigned plastic of paper bad so as to avoid cross-contamination. Treat your mask with utmost caution and always assume it is contaminated. The plastic or paper bag that will receive a worn mask should be considered contaminated as well.
N.B: there are two ways to wear the Bissonnette mask with eyewear: please look at the end of the document entitled "Bissonnette Eyewear-friendly, Two-layer Mask with Room for a Third Layer" to find one the way that works best for you. You may have to bring the mask further up or down your nose several times until you find something that works. Not all eyeglasses are constructed alike so it is difficult to predict what will work to reduce or eliminate fogging of the lenses.
REMOVING YOUR 2020/04/11 Bissonnette Eyewear-friendly, Two-layer Mask with Room for a Third Layer
Always assume your mask is contaminated.
1) Place a plastic or paper bag in which to place the mask near the sink.
2) Remove eyewear by the temples (long horizontal sticks that end behind your ears) and wash your hands and your glasses.
3) DO NOT TOUCH THE MAIN PORTION OF THE MASK but remove the bottom ties of the mask first.
4) Remove the top ties of the mask next and, while holding these top ties, place the mask in the plastic or paper bag and remove the metal wire that fits over the nose (if applicable) and seal the bag shut.
5) WASH & DRY YOUR HANDS AND THE WIRE right after handling.
N.B. While there is no evidence that microwaving can kill the influenza virus, those who decide to microwave their mask should be careful as metal pieces can cause fires and the process may not kill the virus load. Microwave ovens do not always heat evenly so cool spots may exist that do not kill the virus load. If a user insists on microwave heating the mask, it may be best to flip the mask around at intervals to spread the heating effect. Alternatively, the mask should be wet and then put into a heatproof container with a lid and 1/4-inch water. With subsequent water heating, the mask will be thoroughly heat treated in 2 or 3 minutes at 100 degrees C. As importantly, please remember to remove any metal parts from the mask such as the nosepiece wire before microwaving to avoid electrical arcing and subsequent charring or fire.
6) WASH the mask.
The mask must be cleaned after each use to remove any saliva or nasal fluid that will have landed on its surfaces. You may want to use detergent and bleach. If no elastics are used in your mask, the bleach will not damage the materials extensively (since bleach harms elastic). Remember metals are incompatible with bleach too, causing rusting or other forms of corrosion. A non-peer-reviewed French source (written by scientists) suggests washing with detergent at 60̊ C for a minimum of 30 minutes (for complete cycle that includes wetting, washing, rincing). (AFNOR SPEC S76-001, 27 Mars 2020, 11. https://latelierdesgourdes.fr/wp-content/uploads/2020/03/AFNORSpec-S76-001-MasquesBarrieres-AnnexeC-patrons.pdf).
5) DRY the mask.
To further mitigate any possibility of the virus surviving, dry the mask well. You may want to put the mask in the dryer after the washing process is completed. If no dryer is available at home, you could dry the mask at 70 degrees C (160 degrees F) in a gently warm oven at the lowest setting or in a heated clothes dryer for 30 minutes. You may chose to dry the mask at room temperature for more than 4 hours in a quiet untraveled place (away from pets and children) indoors or outside with dry circulating air, perhaps extra time overnight in high relative humidity situations. Alternatively hang the mask outdoors in full sunshine to dry. A rich source of solar ultraviolet light, especially at noon in low latitudes, may also help to kill viruses and bacteria in addition to the drying factor simultaneously at work.